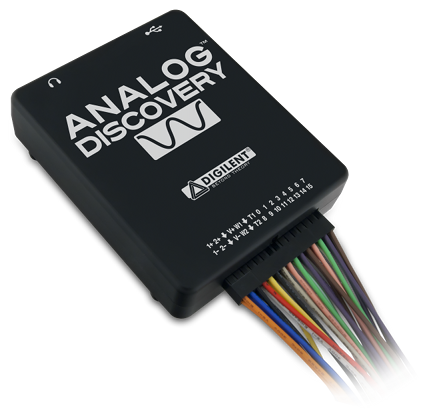
Starting with the Analog Discovery
1. Hardware
To set up the Analog Discovery:
- First install Digilent WaveForms software on your PC. See Installer Details for more information.
- Connect the Analog Discovery to your PC using a USB cable.
2. WaveForms Software
See Installer Details for information on installing WaveForms.
See WaveForms for information on using the
software.
3. Troubleshooting
In case you receive the error message "Communication with device failed"
or "Device configuration failed":
- Remove all the attached components and wires from the Analog
Discovery.
- Verify that the USB cable is attached correctly.
- Reconnect WaveForms to the Analog Discovery and, without opening any
instruments, verify that the WaveForms system monitor is receiving voltage and current levels.
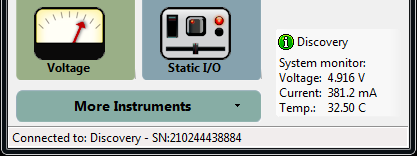
The Analog Discovery's system monitor displays the voltage, current, and
temperature. In the main window, click the Discovery
button to show this information.
When no instrument is running, the device consumes about 2 watts (400mA). Depending on usage, consumption can increase
subject to the following limitations:
- At 500 mA, the Analog Discovery displays a warning because this is the maximum allowed by the USB specification.
- At 600 mA, the Analog Discovery stops and displays an error message. You can disable/enable this feature on the main window. Click the Device button, click Settings, then click Overcurrent Protection.
- At 1 A, the Analog Discovery stops, in order to prevent damage, and displays the "Communication with the device failed" error message.
- See Power Supplies for information
regarding limitation of these.
If you get that error message, or if the voltage is less than 4.5 V, try the following options:
- Connect the Analog Discovery directly to the computer's USB plug, without using an external hub.
- Use the USB connector on the back of the PC, not the one on the front panel.
- Use a good quality, short USB cable without a cable extender.
- Use a USB Y-cable to load power from two plugs.
- Reduce the current consumptions on AWG, V+ and/or V-.
4. Oscilloscope
The Analog Discovery has two differential oscilloscope input channels.
Specifications:
- The input bandwidth is 5 MHz.
- The positive and negative inputs have an impedance
to ground of 1 MOhm in parallel with 24 pF.
- The ADC is 14 bits and 100 MSps, Analog Devices AD9648.
- The absolute maximum input voltage is
±50 V.
- The buffer can be up to 16 kS (default is 8 kS) on two channels.
- The inputs have two gain stages, with 3 mV and 300 uV resolution. See the table below:
| |
low gain |
high gain |
| range |
> 500 mV/div |
<= 500 mV/div |
| differential input voltage |
N/A |
-5 V to +5 V |
| common mode input voltage |
N/A |
-20 V to +5 V |
| positive and negative input voltage to GND |
±25 V |
N/A |
5. Arbitrary Waveform Generator
The Analog Discovery is equipped with two Arbitrary Waveform Generators channels.
Verify the voltage on the Waveform Generator channels before connecting it to a circuit.
Specifications:
- The output bandwidth is 5 MHz.
- The output current is 10 mA.
- The DAC is 14 bits and 100 MSps, Analog Devices AD9717.
- The maximum output is 10 Vp-p, between -5 V and +5 V.
- The resolution
is 0.7 mV for amplitudes above 1 V, and 0.18 mV for amplitudes of 1
V and lower.
- When a channel is closed or disabled, the output is not
in high impedance but close to 0 volt.
- The carrier buffer can be up to 16 kS
(default is 4 kS). The AM and FM buffer is 2 kS on two channels.
- The stereo audio jack outputs the AWG signals. AWG 1 outputs on left channel and AWG 2 on the right channel.
6. Power Supplies
The Analog Discovery has two fixed power supplies.
NOTE: When the power supplies need to drive high capacitive loads, start the supply before connecting the load.
Specifications:
- The positive power supply voltage is 5 V.
- The negative power supply voltage is -5 V.
- The maximum power supply current (the sum of the negative and
positive supplies) is 100mA.
7. Digital I/O
The Analog Discovery has 16 digital I/O (DIO 0-15) and 2 trigger I/O pins.
Specifications:
- The digital pins are supplied at 3.3 V, LVCMOS3V3 standard.
- The
pins have a 4 mA drive strength, slow slew rate Xilinx Spartan6-1L
output.
- The pins have a 220 Ohm series
thermistor (PRG18BB221MB1RB) and diodes (DB3S406F) to GND and 3.3V, having protection between -20 V
and +20 V.
- The pins can output push-pull (PP), open-drain (OD), open-source (OS), and three-state (TS) signals. For OD and OS signals, use external pull-up or pull-down resistors.
- The generator/analyzer frequency is 100 MHz.
- The Logic Analyzer buffer can be up to 16 kS (default is 4 kS).
- The Pattern Generator custom buffer can be up to 16 kS (default is 1 kS).
8. Power Requirements and Limitations
Power to the Analog Discovery is provided by the USB port of the computer to which it is connected. In order to protect the computer's USB port, the current drawn by the Analog Discovery is limited to less than 600 mA. Attempts to draw more power than this from the USB port will cause the Analog Discovery to shut down and display an error message.
The 600 mA limit can be disabled, if desired. Click on Device on the WaveForms main window, select Settings, change Overcurrent Protection to False, and click on Apply. This will allow the Analog Discovery to draw up to 1A of current from the USB port. Disabling the current limits is not recommended, unless you are certain that your USB port can provide the necessary current; demanding more current from your USB port than it can supply may damage the USB port.
The voltage available from the USB port and the current being consumed by the device are displayed on the System Monitor in the lower-right corner of the WaveForms main window; an example is shown below.
The Analog Discovery provides four voltage supplies which can be used to
provide power to circuits being tested. These are: V+ and V-, in the Voltage instrument,
channels 1 and 2 of the waveform generator.
Under normal operation, with no instruments in use and no load applied to
the voltage supplies, the Analog Discovery draws about 400 mA of current from
the USB port. Typically, this results in about 125 - 150 mA available for the
above voltage supplies to provide to external load circuitry.
The allocation of current to the various voltage supplies is left, as much
as possible, up to the user. This allows the user to tailor the available
power to their desired uses, which increases the utility of the device.
There are, however, some limitations placed on the current provided:
- The waveform generator current is limited to less than 50 mA per
channel. No message is displayed by the WaveForms software when this
limit is reached.
- The total current provided by both V+ and V- is limited to less than
200mA.
- The maximum current available for each digital channel is approximately 4 mA.