Install the WaveForms software, if you haven't already. See Installer Details for more information.
Connect your board to your PC using the USB connector and the supplied USB cable.
Start the WaveForms application from the Start Menu > All Programs > Digilent > WaveForms > WaveForms.
The application starts and connects to your board.
The status bar of the WaveForms main window displays the device name and serial number as shown below.
Only one application can be connected to only one board at a time. If you get the message "The selected device is being used by another application" check the taskbar and system tray for other WaveForms applications in use.
If some instruments are not working as expected, try Load Factory Default from that instrument's option window.
If the application is not working as expected, try Erase Configuration from the WaveForms's Options.
If the application is still not working, close WaveForms and launch it in Safe Mode (from the Start menu, choose Programs > Digilent > WaveForms > Tools > WaveForms - Safe Mode). Launching WaveForms in Safe Mode will erase the application's last and default configurations. The last configuration is the one saved by the application when it is closed. The default configuration is the one set by the user.
See the device specific troubleshooting:
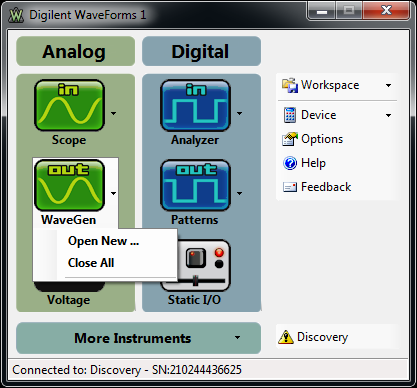
The WaveForms main window (shown above) has buttons for each of the six instruments: Oscilloscope, Waveforms (the Arbitrary Waveform Generator), Voltage (the Power Supplies and Voltmeters instrument), Analyzer (the Logic Analyzer), Patterns (the Digital Signal Generator), and Static I/O (Static Digital Input/Output or SDIO). The Bode and Batch instruments can be opened under the bottom-right button of the main window.
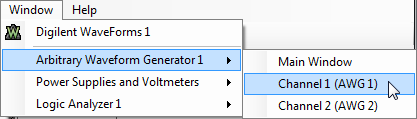
Click on an instrument button to open the instrument's main window (if the instrument is already open, it is brought to the front.) You can open additional instruments of the same type using the drop-down arrow as shown above. Note that only one Voltage and Static I/O instrument can be opened at a time.
An instrument button is disabled when the selected device or configuration does not support it.
The Devices button opens the Device Manager window.
The Open and Save buttons let you load or save instrument workspaces.
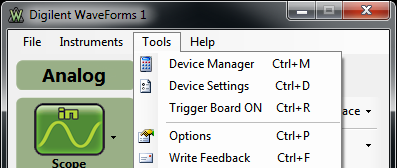
Main window functions are also accessible from the hidden menu strip that is displayed by pressing the Alt key.
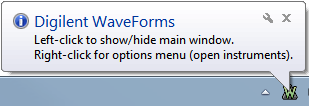
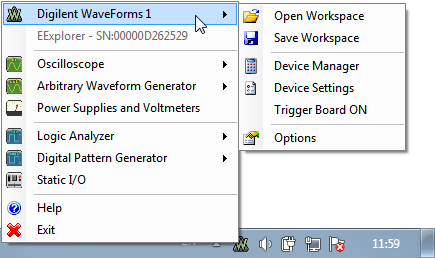
The instruments can also be accessed by right-clicking on the system tray menu as show below.
The workspace refers to any open instruments and their current state. The workspace can be loaded and saved with the Open and Save buttons on the main WaveForms window.
The workspace can be saved in one of the following modes selected by the save filter:
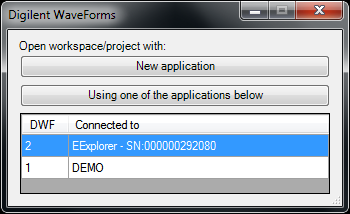
The workspace files are associated with WaveForms. When you open a workspace (double-click on a *.dwfwork file) and WaveForms is running, then the following window is opened.
The project refers to an instrument and its current state. The project can be loaded and saved with the Open and Save buttons in each of the following instrument window: Scope, WaveGen, Analyzer and Patterns .
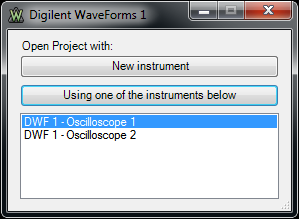
The project files are associated with WaveForms. When you open a project (double-click on a *.dwfscope, *.dwfawg, *dwfanalyzer, *.dwfpatterns, ... file) and WaveForms is running, then the above window is opened. Selecting a running application which has opened instrument the following window is opened.
The Device Manager lets you select the device and configuration to use with WaveForms.
To open Device Manager, from the main WaveForms window select the Device drop-down menu. Select Manager.

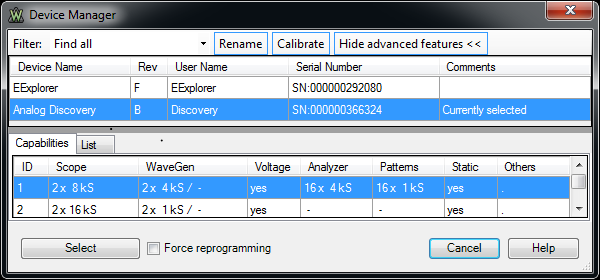
Filter: At the top-left corner is the filter for listing devices. The Find All filter shows the list of found devices and, if none is found, lists only the Demo and Sound Card devices.
Devices: Select the device you want to use. The Demo device lets you explore WaveForm's capabilities without a physical device.
Configurations: Select the configuration you want to use for the selected device. The configurations have different device buffer-memory distributions for the instruments and other capabilities, like number of pins or channels.
Rename: The device's user name can be changed with the Rename button.
Calibrate: The Calibrate button opens the Calibration window.
The Options window lets you select various display and configuration preferences.
To open the Options window, from the main WaveForms window select the Options button.
To change an option, select an item, then select the corresponding drop-down list item.
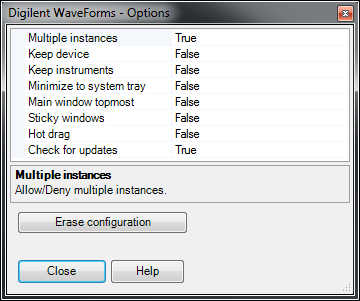
Erase configuration: Erase the last and default configurations.
Close: Closes the Options form and applies the settings.
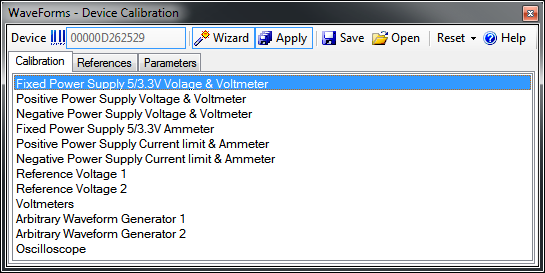
The Device Calibration window lets you calibrate (fine tune) a device's analog components, like the read-voltage levels of the Oscilloscope or Voltmeters and the output level of the Waveform Generator or Adjustable Power Supplies of the Electronics Explorer board, Oscilloscope and Waveform Generator of the Analog Discovery device.
Start the Device Calibration window from the WaveForms main window > Device > Manager > select Show advanced features > Calibrate.
The following window opens. The items in the calibration list depends on the selected device type.
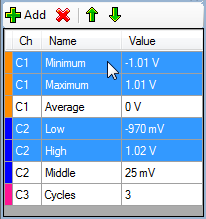
The menu strips of the windows generally have:
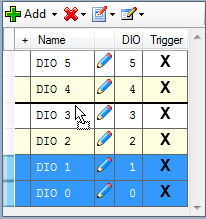
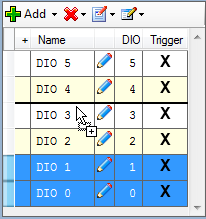
The mouse operations for lists are as follows:
 |
 |
 |
 |
The docking windows functionality gives you flexible organization of docking windows within the parent window.
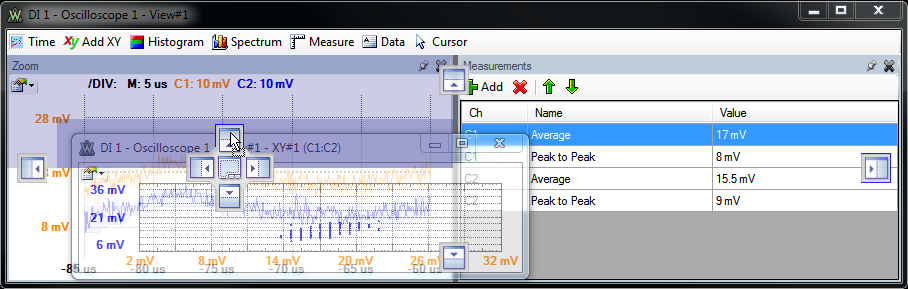
The windows can be dragged by their top border. When dragging is started, small rectangles ![]() appear on the margins of the parent window. These margins indicate the drop regions. If you release the mouse in one of these regions, the child window is docked to the corresponding margin.
appear on the margins of the parent window. These margins indicate the drop regions. If you release the mouse in one of these regions, the child window is docked to the corresponding margin.
If you position a child window above another child window with same parent, a large dock indicator ![]() appears.
appears.
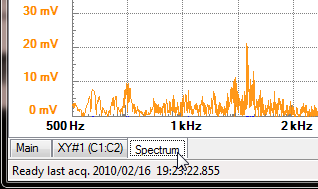
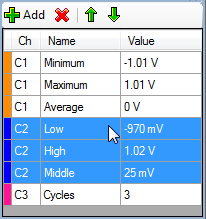
The pushpin lets you tag the waveforms and add short descriptions for them. The pushpin and description can be moved with a mouse drag.
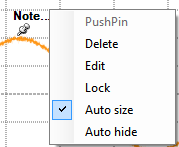
The mouse right-click lets you select the following:
The active instruments (Oscilloscope, Arbitrary Waveform Generator, Analyzer, and Patterns) step through states while acquiring or generating a signal.
From each of these instruments, four windows can be opened at a time but only one instance can be active at a time. When more instruments of the same type are opened, the last used instance (Run or Stop press) controls the device. The others display a Busy status.
The following diagram illustrates the states of the: Arbitrary Waveform Generator and Digital Pattern Generator.
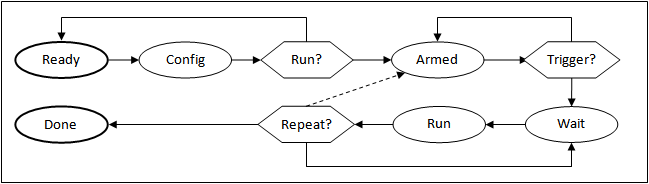
The Repeat cycle can be configured to include Trigger or not.
If any setting (frequency, duty, signal type, etc.) is modified, from any state, it goes right to the Config state. If the instrument was running, it will be started again.
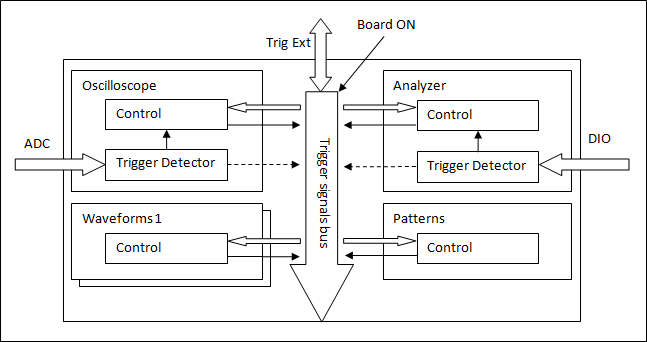
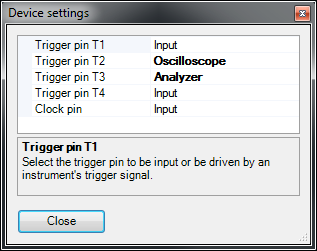
The trigger event is the rising edge of the trigger signal. The Electronics Explorer board has four trigger input pins. They are used by the Oscilloscope, Arbitrary Waveform Generators, Logic Analyzer, and Digital Pattern Generator instruments. The instruments output a trigger signal as long as they are in Run state.
Any of these instruments can be triggered by any of the trigger signals coming from external pins or the other instruments.
The Arbitrary Waveform Generator channels can function as independent instruments, having own controller, or in synchronized mode when the selected channels are controlled by the master channel's controller.
The input instruments (Oscilloscope and Analyzer) have a trigger detector based on their input channels.
The Board ON trigger event is generated by the switch on the board or by pressing the button under the main window device menu.
The None trigger mode configuration in the instruments means that acquisition or generation doesn't wait for a trigger, it starts immediately.
The Auto trigger mode for input instruments means that if the trigger condition doesn't appear in approximately two seconds, acquisition is started automatically.
In multiple acquisition mode, when the instruments switch to Auto trigger, subsequent acquisitions are made without waiting for timeout as long as a trigger event does not occur and the configuration is not changed. When a new trigger event occurs or the configuration is changed, the current acquisition is finished and the next one waits for the trigger. It is also the best mode to use if you are looking at many signals and do not want to set the trigger each time.
In the Device settings window depending on the connected device the following can be configured:
Eletronics Explorer:
Analog Discovery:
The following are the command line arguments for the WaveForms application:
In order for these options to work, the path where the application is installed has to be selected in the command line.
The Digilent installers, like DigilentWaveForms.exe, have the following command line arguments: