Setting up and installing the required EDA softwares
Mac users: start from step 1
Windows 10 users: skip directly to step 5
1. Download and install the latest Oracle VM VirtualBox for Mac OS X
download Oracle VM VirtualBox Base Packages
download VM VirtualBox Extension Pack
download VBox GuestAdditions
2. Download the iso disk image of the latest Ubuntu Desktop LTS distribution
3. Start Virtual Box and create an Ubuntu VM
4. Setup the Virtual Box as follows
select View > Auto-resize Guest Display
select View > Virtual Screen 1 > Scale 150 % (or whatever size you prefer)
select Devices > Drag & Drop > Bidirectional
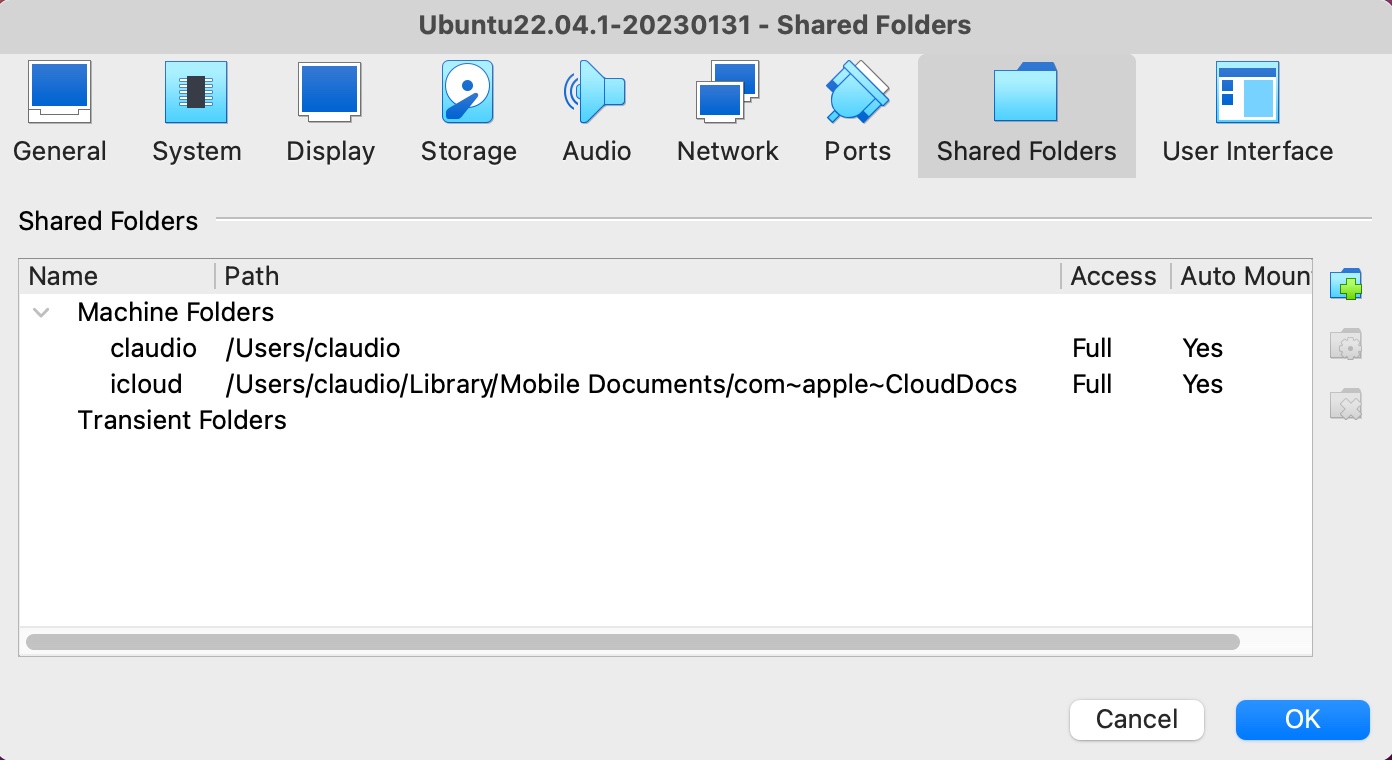
... and don't forget to make any Mac's folder on which you will store your designs sharable
select Devices > Shared Folders > Shared Folders Settings
 |
5. Let's install a few Windows/MacOS based EDA softwares
6. Download and install LTspice
7. Download and install ngspice
Windows Users:
download the zip file ngspice-<xx>_64.zip
replace <xx> with the number corresponding to the latest version of ngspice (e.g., 38)expand the zip file in some_location for which you have read and write access (example: C:\Users\claudio)
the ngspice executable (ngspice.exe) is in <some_location>\ngspice-<xx>_64\Spice64\bin
(example: C:\Users\claudio\ngspice-<xx>_64\Spice64\bin\ngspice.exe)NOTE: if you get complains about missing dll files, download and copy the missing dll files in the bin directory
Download and install the 64-bit version of the file archiver utility 7zip
Download and install the ngspice GUI
Download the zip file ngspice_start.7z
Expand its content in <some_location>\ngspice-<xx>_64\Spice64\bin
(example: C:\Users\claudio\ngspice-<xx>_64\Spice64\bin)The executable is DuSpiceStart.exe
NOTE: if you get complains about missing dll files, download and copy the missing dll files in the bin directory
Mac Users:
At the CLI run the command: sudo port install ngspice
8. Download and install the ngspice GUI
download the zip file ngspice_start.7z
expand its content in <some_location>\ngspice-<xx>_64\Spice64\bin
(example: C:\Users\claudio\ngspice-<xx>_64\Spice64\bin)the executable is DuSpiceStart.exe
NOTE: if you get complains about missing dll files, download and copy the missing dll files in the bin directory
9. Download and install the latest version of Java
10. Install the latest “java” version of Electric VLSI Design System
get the GNU electric binary release, version 9.07
copy the file (electricBinary-9.07.jar) in a location for which you have access
(example: C:\Users\claudio\ElectricVLSI)
11. Download and install M.H. Perrott's Hspice Toolbox
The Hspice Toolbox for matlab and Octave is a collection of matlab routines that
allow the user to manipulate and view signals generated by Hspice and Ngspice
download the file hspice_toolbox.tar.gz
expand and untar the file in some_location for which you have read and write access (example: C:\Users\claudio)
12. Download and install the latest MobaXterm Home Edition (portable edition)
The goal of installing mobaXterm is to provide Unix commands and tools to the Windows desktop environment
extract the zip file downloaded to some_location on your computer
(example: C:\Users\claudio)
13. Setup MobaXterm
start MobaXterm
 |
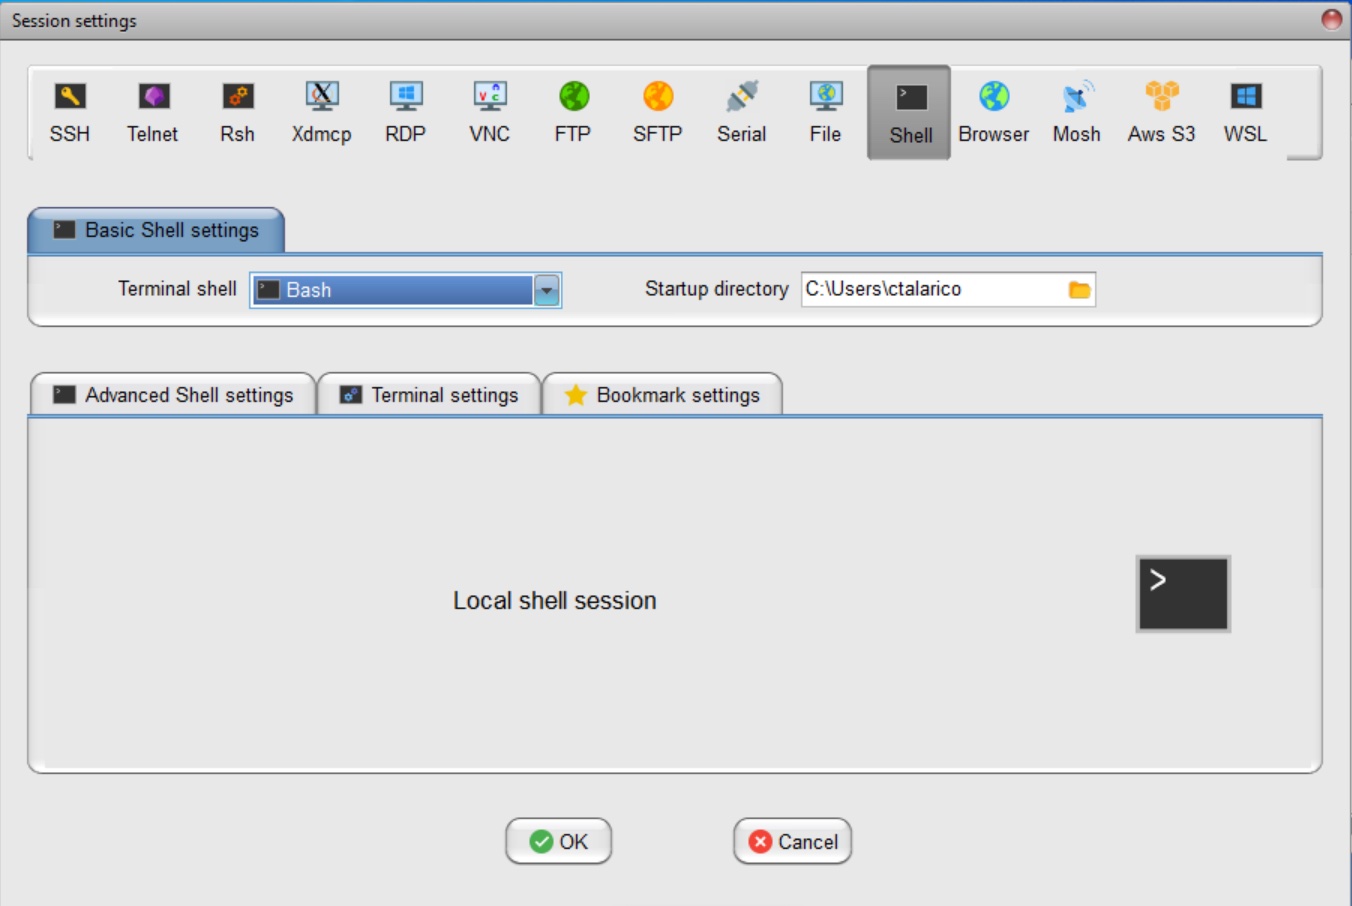
create a default User Session
User Sessions > New Session > Shell
define the Basic Shell settings
Terminal Shell: bash
Startup directory: browse to your home directory
don't forget to click OK to save the preferences
 |
 |
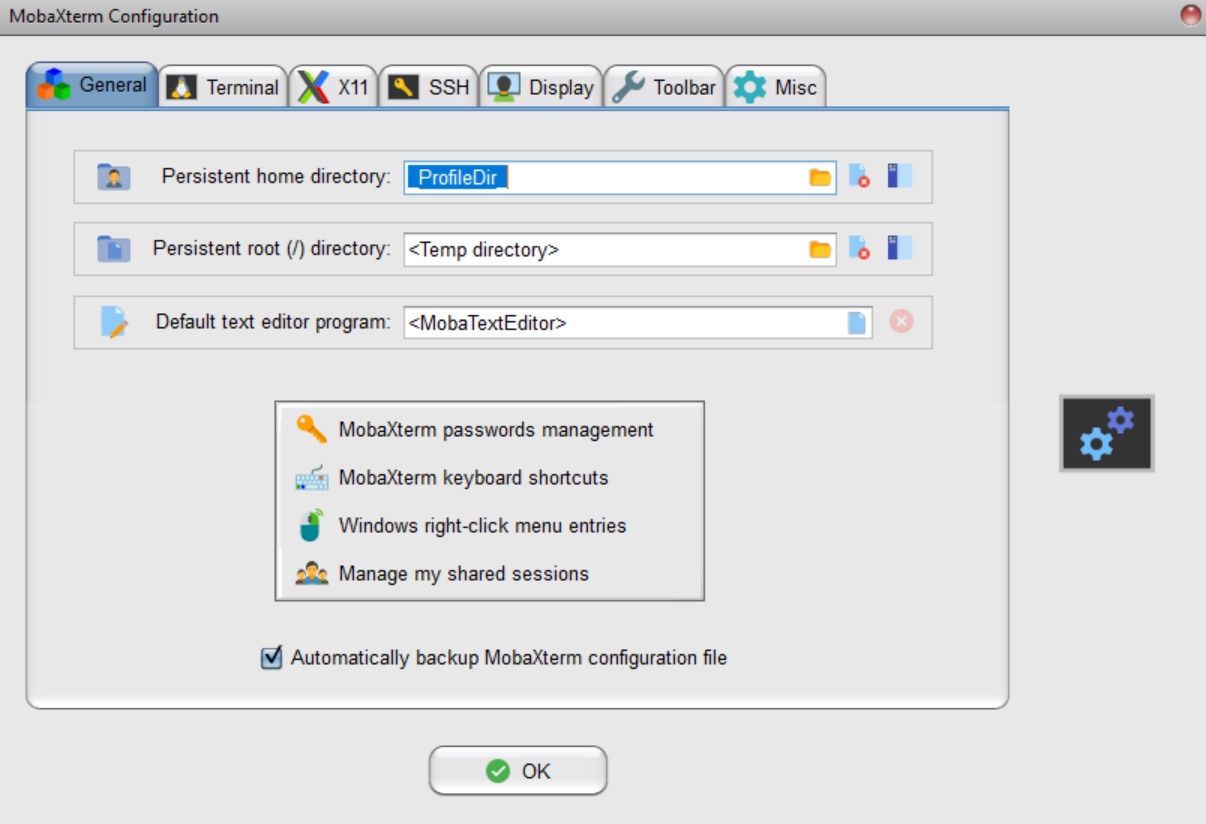
customize your Shell preferences
click on the Settings icon
select the General Tab and make your home directory persistent
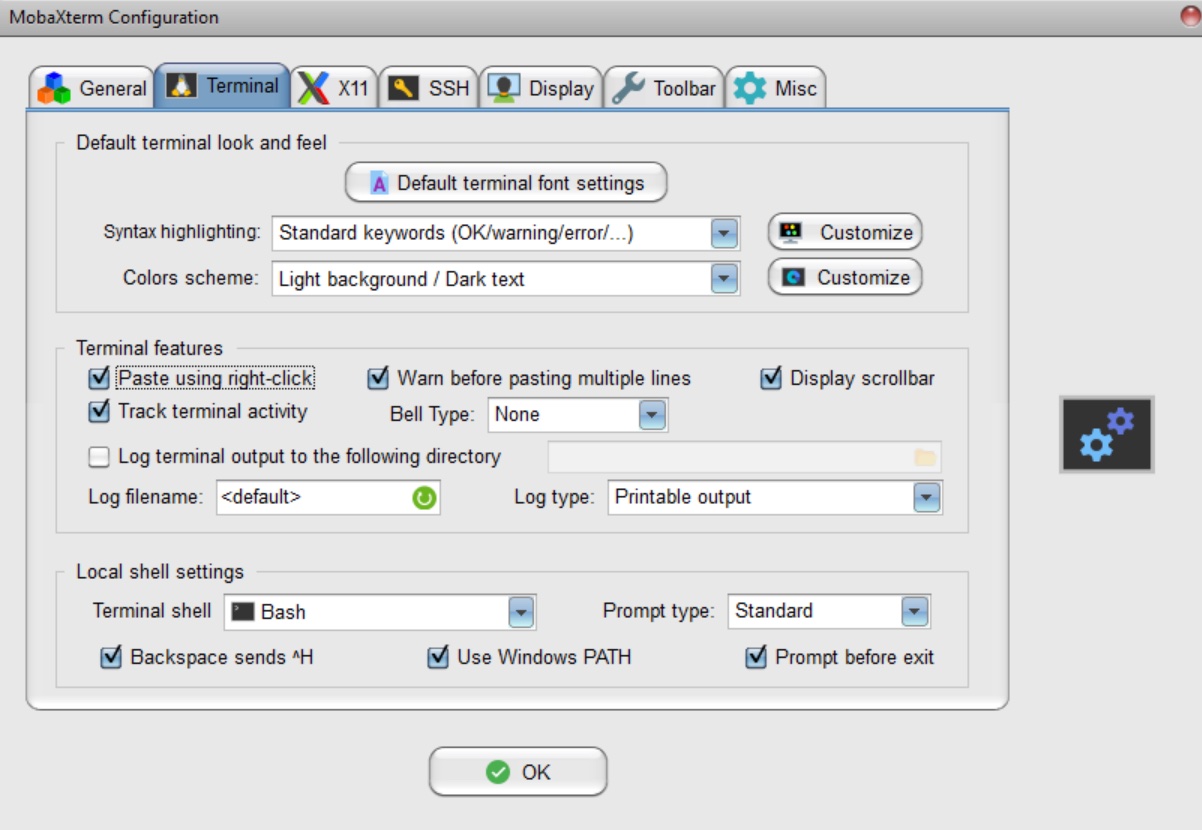
select the Terminal Tab and customize the various options according to your “taste”
select the Display Tab and customize the various options according to your “taste”
 |
 |
 |
 |
Go to MobaXterm's home directory and create a .bashrc file and a .bash_profile file.
The goal is to set the working environment so that we can use the EDA tools from MobaXterm's CLI (command line interface)
NOTE: The MobaXterm's home directory is set (/home/claudio) to the Windows home directory (/mnt/c/Users/claudio), but in general it could be set to a different directory
cd /home/claudio
#!/bin/bash
alias ll='ls -alF'
alias la='ls -AF'
alias l='ls -aCF'
alias cdwin='cd /mnt/c/Users/claudio'
alias cdmoba='cd /home/claudio'
alias lts='/mnt/c/Program\ Files/LTC/LTspiceXVII/XVIIx64 &'
alias electric='cd /mnt/c/Users/claudio/ElectricVLSI; java -jar electricBinary-9.07.jar -sdi; cd /home/claudio'
# Windows home directory
export WINHOME=/mnt/c/Users/claudio
# MobaXterm home directory
export MOBAHOME=/home/claudio

# path to ngspice binaries
NGS_BIN=/mnt/c/Users/claudio/ngspice-35_64/Spice64/bin

if [ -f /home/claudio/.bashrc ]; then
source /home/claudio/.bashrc
fi

# Path
PATH=$PATH:$NGS_BIN

# Remove duplicates and export the PATH
export PATH=$(echo -n $PATH | awk -v RS=: '!($0 in a) {a[$0]; printf("%s%s", length(a) > 1 ? ":" : "", $0)}')